Showing posts with label Hobbies. Show all posts

Sunday, June 28, 2015

Purple & black decoupage wall clock for my grandmother

Once upon a Christmas I offered to my granny to make her a decoupage wall clock. We sat down at my computer and with my help she browsed some napkins online to choose the pattern she likes. I was expecting pastel roses or a romantic bouquet, but surprise, surprise, she chose one very modern and cool design. Good for you, granny! 
Jednom prilikom za Božić ponudila sam baki da joj napravim dekupaž zidni sat. Sele smo za moj komijuter i izbirale online salvetu koja joj se dopala. Očekivala sam neke pastelne ruže ili romantični buket, a ona je umesto toga izabrala jedan baš moderan dizajn. Svaka čast, bako!

It took me some pretty time to make her the clock, my decoupaging output being a couple of pieces a year (oh, I wish I had time to do more!), and so I proudly went to visit my grandmother around Easter time to give her the clock. Imagine my surprise when I walked in her anteroom and saw some other decoupage clock already hanging on the wall!
Trebalo mi je puuuno vremena da joj napravim taj sat, pošto uspevam da napravim svega par stvarčica godišnje (što bih volela da imam više vremena!), i tako sam ja sva ponosna tamo negde oko Uskrsa otišla da odnesem baki sat. Zamislite moje iznenađenje kada sam ušla u predsoblje a ono tamo već visi dekupaž sat!


As it turned out, my grandma had well remembered that she "commissioned" a clock but forgot from whom. So sometime in between she asked my perplexed mom, when she'll be finishing the clock? My mom just shrugged, and although confused, having been doing decoupage herself, just made my grandma a clock, a pretty winter flowers inspired piece. And my grandma was happy and did not expect me to come by and bring her jet another clock! Enough to say, when we had it all figured out we all had a nice laugh. And that is how my grandmother now has two decoupage clocks.
Kako se ispostavilo, baka se itekako sećala da je "poručila" sat, ali je zaboravila od koga. I tako je ona u nekom momentu između pitala moju mamu kad će sat biti gotov? Mama se zbunila, al šta će, pošto i sama radi dekupaž, napravila je baki sat, lep inspirisan zimskim cvetnim motivima. I tako je baka bila zadovoljna što je dobila svoj sat ali se nije nadala da ću ja da dođem sa još jednim! Da skratim priču, barem smo se slatko nasmejale kada smo sve lepo raščivijale. I tako baka sada ima dva dekupaž zidna sata.


The background of this clock was black because the napkin itself has had the black background. I have hand-draw some parts of purple the vines and leafs using the amazing metallic colors by Stamperia (I love them!). There is a lot of silvery and pearly translucent details that are not to easy to catch on the photographs. The clock hands were also hand colored in gold with a permanent marker in order to make them "pop" from the background. All in all, I was pretty happy how it all turned out.
Sat je rađen sa crnom pozadinom, jer je takva i pozadina salvete. Delovi ljubičastih grančica su ručno dorađivani i iscrtavani fantastičnim metalik Stamperia bojama (obožavam ih!). Odgore ima puno srebra i sedefa, što nije tako lako uhvatiti foto aparatom. Kazaljke na satu sam takođe ručno bojila i to koristeći marker u zlatnoj boji, da bi se povećao kontrast i vidljivost naspram pozadine. Sve u svemu, bila sam prilično zadovoljna kako je sve na karju ispalo.

Sunday, September 14, 2014

Manly man's decoupage box

It's easy to make a decoupage gift for a woman or a girls. That's a no-brainer. How about when you want to make a decoupaged gift for a guy? Things get far more complicated. You need to think about what men like, what colours are appropriate (surely not pink), what themes are acceptable (pretty flowers or romantic lady portraits are probably out of the question), and where to FIND material with such motifs.
Smisliti dekupaž poklon za žene ili devojke nije nimalo teško. Nikakva problem! Ali šta ako treba da smislite dekupaž poklon za mušku osobu? Tu stvari postaju puno komplikovanije. Treba smisliti šta je to što se muškarcima dopada, koje boje su prigodne (sigurno ne roza), koje teme su prihvatljive (lepi cvetići ili romantični ženski portreti sigurno otpadaju), i naravno, treba PRONAĆI materijal sa takvim motivima.
This is my take on decoupage for a guy. I've made it for a colleague, and my first (and only) real customer so far, as a small parting gift of appreciation when he was leaving the company.
Ovo je jedna moja vizija dekupaža za muškarca. Kutijicu sam napravila kao mali poklon kolegi, mojoj prvoj (i jedinoj) pravoj mušteriji, kada je odlatzio iz firme.
It's something I've made some time ago but didn't get the chance to share it yet (as is the case with most of my decoupage works, but I need to start somewhere). My only regret is that it was a last minute photo shoot, and now I see that some angles I usually like to take and share are not there... What can I do, c'est la vie!
Ovo je napravljeno pre dosta vremena, ali do sad nisam objavila (što je slučaj sa većinom mojih dekupaž radova, ali od negde treba početi). Jedino mi je žao što smo fotografisali u poslednji čas pa sam tek naknadno shvatila da nemam uslikane neke uglove koje inače volim. Ali, šta da se radi...

Wednesday, July 23, 2014

Decoupage box and coasters for a special friend

The good old previous post showed us at work and having fun in the process, but now let me introduce the focus of all that work (two girls and two afternoons, which might seem too long to some, but count in our perfectionism and some chit-chat over a cup of coffee, and you'll get the calculation straight).
U dobrom starom prethodnom postu videli ste nas na delu i kako uživamo u procesu, a sada evo da predstavim ono čime smo se bavile (dve ženske u dva popodneva, što nekom može delovati previše za ovaj posao ako nema u vidu koliki smo obe perfekcionisti i povremene pauze za kafu i blebetanje).


Marina and I have had the pleasure of meeting many wonderful fellow creatives online, on Facebook especially, and one of them is our dear Vlasta form Croatia. After receiving beautiful necklace pieces she made to surprise us, it was our turn to surprise her (for Valentines day) with something we made. We debated and deliberated and brainstormed and finally found our inspiration in her profile picture: a beautiful clown. Then we researched the web far and wide and found our that the clown was drawn by Mira Fujita. We were awed by the author's works and pictures and we decided to use them to make one very special decoupaged box and a matching set of coasters.
I Marina i ja smo do sada imale čast da upoznamo puno divnih kreativaca putem interneta, a naročito na Fejsbuku. Jedna od njih je i naša draga Vlasta iz Hrvatske. Ona nam je priredila predivno iznenađenje poslavši nam ogrlice koje je napravila za svaku od nas, i sada je bio naš red da uzvratimo iznenađenjem (za dan zaljubljenih). Puno smo se razmišljale, dogovarale, razmatrale i konačno našle svoju inspiraciju u njenoj profilnoj slici: jendom preslatkom klovnu. Onda smo pretražile internet uzduž i popreko dok nismo saznale da je autor te slike Mira Fujita čije su nas slike potpuno oduševile pa smo odlučile da na tu temu u dekupaž tehnici (a šta drugo?!) uradimo jednu sasvim posebnu kutiju i komplet podmetača uz nju.


What followed were two great creative afternoons in which we learned more about collaboration on a creative projects, how to blend two visions into a single one and make it that much better than we imagined in the beginning. This was the best possible opportunity to try out my new color printer at rice paper printing task. It proved somewhat tricky, but it was worth the effort in the end. We also remembered how difficult it is to catch the elusive silvery shimmer of pearly paints, but I hope these photos do the justice to the beautiful end product of our endeavour. Made with love, for someone who touched us with her kindness and good heart.
Ono što je usledilo su dva fenomenalna kreativna popodneva koja su nas naučila ponešto o zajedničkom radu na jednom kreativnom projektu, i o tome kako od dve vizije stvoriti jednu zajedničku koja prevazilazi sva očekivanja. Bila je to i savršena prilika da isprobam svoj novi kolorac i štampu na rižinom papiru. Iako nije bilo najjednostavnije, definitivno je vredelo truda. A takođe smo se potsetile i koliko je teško na fotografiji uhvatiti onaj fini meki preliv i sjaj sedefnih boja, s tim da se najiskrenije nadam da su uspele dočarati lepi rezultat našeg rada. Napravljeno sa ljubavlju, za nekog ko nas je dirnuo svojom ljubaznošću i dobrotom.


Tuesday, February 25, 2014

Two workshops in two days

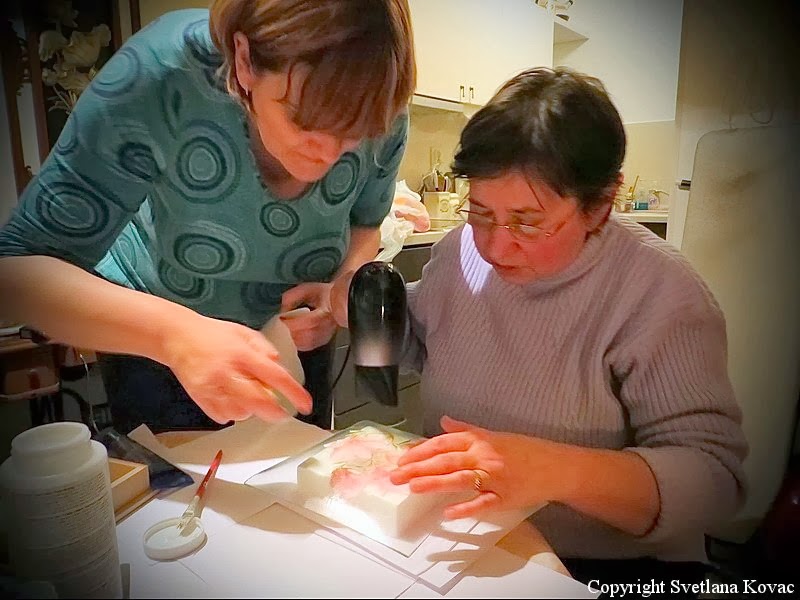
YES! It is true! After the longest time of no-time-to-do-anything, we stole away two windy and stormy afternoons for ourselves, a special occasion, to spend nice time together and to do something nice. After all, the nicest time is when you spend it with family. Marina and I were working on one very special gift while my mom was making her first steps doing decoupage on glass.
DA! Naslov je tacan, posle vremena i vremena nemanja vremena, ukrali smo dva vetrovita olujna popodneva jednim specijalnim povodom, a i da se malo druzimo i radimo nesto lepo. U krugu porodice je, naravno, uvek najlepse. Marina i ja smo pravile jedan poseban poklon, a mama je pravila svoje prve korake dekupaza na staklu.

And here are the pictures to show how great crew we were!
Evo slikica da se vidi kakva smo vredna ekipica bili!


Sunday, October 27, 2013

Decoupage lavender candles

There's first time for everything, right? Well, this is my first take at decoupaging candles. As far as I have seen online, it is not so common to do this type of decoupage, but I got a request and idea from a friend and that's how it started.
Postoji prvi put za sve, a ovo je moj prvi dekupaž na svećama. Koliko sam primetila, ovaj tip dekupaža se ne radi često, ali dobila sam ideju i molbu od drugarice i tako sam počela.
Actually, what my friend asked for was a candle with pressed flowers in it. But I don't do pressed flowers, don't have the expertise, nor the pressed flowers themselves to begin with, and absolutely no time to go hiking, collect flowers and do the pressing part. So I resorted to something familiar to me that can produce flowers on a candle - napkin decoupage.
Zapravo, drugarica je tražila sveću u koju su utisnuti sušeni cvetovi, ali s obzirom da se ne bavim sušenim cvećem, da ne znam kako se to radi, a i da nemam sušenog cveća niti vremena da odem u prirodu, uberem cveće i osušim ga, okrenula sam se nečemu što znam a može da proizvede cvetove na sveći - dekupažu.
I did very little research on the subject, given the fact that my candles won't be required to burn but will rather have ornamental purpose. I've used a regular napkin glue/polish on a wide white candles so that in case that they are lit, the flame doesn't come near the napkin.
Moram priznati da nisam mnogo istraživala ovu temu pošto nisam planirala da se sveće pale nego više da imaju ukrasnu ulogu. Koristila sam običan lepak/lak za salveta tehniku na širokim belim svećama, tako da čak i u slučaju da se sveća upali plamen ne dođe do salvete.
Big plus for candle decoupage: no need to prepare the surface if you get a plain white candle, no painting base coats of white; much faster to get to the finished product.
Pozitivna strana dekupaža na svećama: nema potrebe za pripremom podloge ako se koristi bela sveća, nema prefarbavanja u belo, i mnogo se brže dolazi do gotovog proizvoda.
Small minus for candle decoupage: difficult to work with larger motifs because of the round and in some cases uneven surface; the background is always white (if you don't want to try painting on it or covering the whole surface with a napkin).
Negativna strana dekupaža na svećama: bilo bi teško raditi sa nekim većim motivom zbog zaobljene podloge koja može ponekad da bude i neravna, a pozadina je uvek bele boje (osim ako ne želite da se upetljavate u farbanje sveća ili oblaganje cele sveće salvetom).
I have also made a coaster for each candle, just in case. And it looks cooler this way, I think.
Uz svaku sveću sam takođe napravila i podmetač, za svaki slučaj, ako vosak curi negde. A i sviđa mi se ovako ukompletirano.
Enough talk, the results are here:
Bilo je dosta priče, evo rezultata:


Saturday, December 22, 2012

My first decoupage hair brushes

This is how I spent my late summer vacation in the city - creatively! I've made these decoupage hair brushes two during one of the little summer family decoupage workshops I've already written about.
Ovako sam ja provela svoj godišnji odmor u gradu - kreativno! Ove dve četke za kosu ukrašene dekupaž tehnikom sam napravila na jednoj od naših malih porodičnih radionica o kojima sam već pisala.

I've seen others doing decoupage on plain wooden hair brushes and having had a couple in my repro stack, I've decided to give them a try. I was also insipred by my aunt Marina's work and the decoupage hair brushes that she had made before.
Viđala sam da ljudi rade dekupaž na običnim drvenim četkama za kosu i pošto sam imala nekoliko u mom šteku reporomaterijala, odlučila sam da probam. Inspiracija mi je takođe došla i od moje tetke Marine i dekupaž četki koje je ona već pravila.

What I did with the brushes is good old napkin decoupage with some additional acrylic colours, glitter, 3D gels and ribbons. I must say that I LOVED making these brushes, they might be my favourite objects to do decoupage on. They are so much fun, give lots of space for creative solutions and new ideas, and they also make great gifts. I've made a couple more on other workshops and I also plan to do new ones these days. You'll see them soon!
Četke sam radila u staroj dobroj salveta tehnici sa dodatkom aktilnih boja, glitera, 3D gela i trakica. Moram da kažem da mi se MNOGO dopalo ukrašavanje četki, čak bih rekla da su mi postale omiljeni predmet za dekupaž. Zabavne su, ostavljaju prostora za kreativnost i nove ideje, a takođe su i odlične kao pokloni. Pored ovih, napravila sam još nekoliko a planiram da pravim još par novih u skorije vreme. Uskoro ćete imati priliku da ih vidite!

Sunday, December 09, 2012

Cheerful coasters (napkin decoupage)

Cheerful coasters done in napkin decoupage technique on cardboard. I love this napkin and its colorful pattern. It inspired me to make the back side of coasters in different colors and with different flower motif so that they remain true to playfulness of colors.
Veseli podmetači rađeni u salvetnoj dekupaž tehnici na kartonu. Obožavam ovu salvetu i njen šareni dizajn. Ona me je i inspirisala da zadnje strane podmetača napravim u različitim bojama i sa različitim cvetićima tako da u svakom pogledu ostanu veseli i šareni.

Also, probably the longest coasters in the making ever - I've started working on them in spring and finished them in fall. That's how much time I have for my creative work these days (moping sound). In the meantime, a friend of mine for whom I've made these, got another fabulous set of decoupage coasters and now she has two. In my opinion, one can never have enough coasters, so no real problem there.
Takođe, ovo su verovatno najduže pravljeni podmetači u istoriji - započeti u proleće a završeni na jesen. Eto koliko u poslednje vreme mogu da se posvetim kreativnom radu (šmrc). U međuvremenu je drugarica kojoj sam namenila ove podmetače dobila drugi pedivni komplet podmetača takođe u dekupažu i sada ima dva kompleta. Ali podmetača nikad dosta, ako mene pitate, tako da mislim da to i nije neki problem.

PS. Winnie loved them so much, he just had to be in a picture. :)
PS. Viniju su se podmetači toliko svideli, da je morao da se uslika sa njima! :)

front side / prednja strana

back side / zadnja strana

Thursday, October 11, 2012

Fairy bracelets

These two Fairy bracelets are my take on Fairy / Faerie jewelry - as by requirements of Bluebell Boo's Fairy / Faerie swap. At first I was a bit worried that it would be very had to come up with an idea on this subject, but then I came up not just with one, but with FIVE great ideas! Hope you'll see the rest of them here soon.
Ove Vilinske narukvice su moj odgovor na temu Vilinskog nakita - po zadatoj temi na razmeni koju je organizovala Bluebell Boo. U prvom momentu sam se zabrinula da će biti teško smisliti nešto na ovu temu, a onda sam umesto jedne dobila čak PET odličnih ideja! Nadam se da ćete i preostale četiri videti ovde u skorije vreme.

I've used two wooden bracelets, one of which is round and the other one square-ish, and did some napkin decoupage work on them. The motif is applied only to one segment of the bracelet, and it is lined with 3D metallic gel pens.
Koristila sam dve drvene narukvice, od kojih je jedna okrugla a druga pomalo kockasta, i na njima sam radila dekupaž salvetnu tehniku. Motiv zahvata deo obima narukvice a oivičen je sa 3D metalik gelom.

Swap theme satisfied and here are some very vearable fairy-inspired bracelets!
Tema za razmenu zadovoljena i evo ih dve veoma nosive narukvice inspirisane vilama!


Thursday, September 27, 2012

Summer decoupage workshops

Summer is over but I will remember fondly the good times and the fun. Despite the heat and extreme temperatures, I had plenty of inspiration and drive to "play" creatively. Here are some photos form our informal little decoupage workshops where we had loads of fun in good company!
Leto je prošlo ali se rado sećam dobre zabave i druženja. Uprkos vrelini i ekstremno visokim temperaturama, imala sam puno inspiracije i želje za kreativnim "igrarijama". Evo nekoliko sličica sa naših malih neformalnih dekupaž radionica, gde smo uživali u radu i dobrom društvu.
 
In next posts more about the resulting decoupaged goodies! :)
U narednim postovima pisaću vam o stvarčicama koje sam napravila! :)

Sunday, September 09, 2012

Twin cards - wedding card and chistening card

Today I want to share two cards: a wedding card and a christening card. I made these two long time ago, but I didn't want to publish them until both were given to their recipients. They have similar design, only the colour scheme and sentiment are different. Which one do you like better?
Za danas sam spremila da pokažem dve čestitke, to su čestitka za venčanje i čestitka za krštenje. Napravila sam ih dosta davno ali nisam htela da ih objavljujem dok obe ne butu uručene svojim primaocima. Dizajn čestitki je vrlo sličan, razlikuju se po boji i poruci. Koja od njih vam se više dopada?

Wedding card - created at my sister's request for a wedding of her friend Ivana.
Čestitka za venčanje - pravljena po želji moje sestre za venčanje njene drugarice Ivane.

 
Christening card - created for one cool little guy.
Čestitka za krštenje - pravljena za jednog malog kul momka.

Tuesday, August 21, 2012

Decoupage bachelorette party invitations

I honestly don't know if it is common or not to send formal invitations for a bachelorette party. The world is big and there probably are places where this is a given. However, here it is not. Nonetheless, why not do it?
Da budem iskrena, ne znam da li je formalno slanje pozivnica za devojačko veče uobičajeno ili ne. Svet je velik i sigurna sam da postoje mesta gde se to podrazumeva. Kod nas ne. Ali zašto da ne?

It had been a while since I last did something creative, and so I decided that my sister's bachelorette party was the perfect excuse to finally let the creative steam out and make something nice - a set of invitations for her bachelorette party (which I was organizing).
Prošlo je dosta vremena od kako sam poslednji put napravila neku kreativnu stvarčicu pa mi je sestrino devojačko veče bilo savršena prilika da konačno "odvrnem kreativnu slavinu" i napravim nešto lepo - komplet pozivnica za devojačko veče (čiji sam organizator bila ja).
***
I have created a set of cards / invitations using napkin decoupage and card making techniques. Doing decoupage on soft and rather thin cardboard was a new thing to me. I was worried that the cardboard will lose its shape when wet from the glue / varnish, but in the end it all turned out for the best and I was very happy with the results.
Napravila sam komplet pozivnica koristeći dekupaž salveta tehniku i tehnike za pravljenje čestitki. Za mene je bilo novo to što sam radila dekupaž na mekanom i tankom kartonu i brinula sam se da će se karton deformisati od vlažnog lepka / laka, ali je na kraju sve dobro ispalo i bila sam zadovoljna rezultatom.

 ***
What I wasn't happy about was when most of the girls canceled on a day when I planned to give them the cards so that they received their invitations on the evening of the party. But c'est la vie! On the bright side, they all were surprised and had liked the cards and had brought home something to remind them of the occasion. Mission accomplished!
Ono čime nisam bila baš zadovoljna jeste to što se većina devojaka javila da ne može da dođe na sastanak onog dana kada sam htela da podelim pozivnice, pa su ih dobile na samo devojačko veče. Ah dobro, c'est la vie! Dobro je to što sam ih iznenadila, što su im se pozivnice dopale i što su sa sobom ponele nešto što će ih podsećati na ovaj događaj. Misija uspela!

Thursday, December 08, 2011

Little fair of beautiful things (Sunday)

Sunday continues the tradition of that weekend with the visit to the 15th Mali sajam lepih stvari (Little fair of beautiful things) in Studio M in Novi Sad. The Little fair is one of my favourite events and try not to miss an opportunity to go there, see many crative pepople and their beautiful works all in one place. I took a few pictures, looked around, and went for a coffee with my friends. Here's the sneak peak of the Little fair, and I invite you to come and see it for yourselves if you have a chance!
Taj čuveni kreativni vikend se nastavio sa nedeljom i posetom 15. Malom sajmu lepih stvari u holu Studija M u Novom Sadu. Mali sajam je jedno od mojih omiljenih dešavanja u gradu i trudim se da ne propustim priliku da odem i obiđem ga, vidim kreativce i njihove radove sve na jednom mestu. Uslikala sam nekoliko fotografija, pogledala čega sve ima, i završila sa drugaricama na kafi. Evo da vidite kako je bilo na Malom sajmu, a ako budete u prilici dođite i sami da ga vidite!
On that Sunday I've also started doing my inchies for the inchies swap, but that is a story for Moday too i.t. for the next post.
U tu nedelju sam takođe krenula da pravim svoje inčiće za razmenu, ali to je priča koja se proteže i na ponedeljak, što znači da će imati svoj poseban post. :)

Monday, November 28, 2011

Polymer clay patina effect workshop (Saturday)

After decoupage in a family circle on Friday, Saturday was the day for the polymer clay.
Posle dekupaža u krugu porodice u petak, subota je bila rezervisana za polimersku glinu.
I've participated in a patina effect on polymer clay workshop organized by Mali Sajam Lepih Stvari i.e. Bilja (from Biljina HOBBY svaštaonica blog) and Ela (her page on Facebook). Bilja was our instructor, while at the same time Ela was teaching Venetian mask decorating, so we had a glimpse at that too. I must say that the masks that they made were beautiful and made me want to explore uncharted lands of plaster and molds. :)
Učestvovala sam na radionici patiniranja polimerske gline koju su organizovale Bilja sa bloga Biljina HOBBY Svaštaonica i Ela koje su i oragnizatorke Malog sajma lepih stvari. Bilja je bila naš instruktor, a istovremeno se odvijala i radionica dekorisanja venecijanskih maski koju je vodila Ela pa smo mogli da bacimo pogled i na njih. Moram da kažem da su napravili tako lepe maske da sam poželela da i ja istražim nove teritorije gipsa i kalupa. :)
It was really great to learn a new technique that I hardly knew anything about. A plus was the fact that I was working with Bilja and Neda who really know their polymer clay, so I had a chance to observe and learn a lot. And last but not least, I've enjoyed it immensely and I love the effect itself! I'll definitely use it often now that I know how to do it!
Bilo mi je super da naučim novu tehniku o kojoj do tada nisam skoro ništa znala. Plus na sve to je bilo to što sam imala priliku da radim sa Biljom i Nedom koje se razumeju u polimersku glinu, tako da sam mogla da vidim i naučim štošta. I za kraj, baš sam uživala, a ovaj efekat mi se jako sviđa! Definitivno ću ga često koristiti sada kad znam kako se radi!
Bilja and Ela will be organizing many more great creative workshops in Novi Sad, so check them out and treat yourself to knowlegde and some good time:
Bilja i Ela organizuju i druge zanimljive radionice u Novom Sadu, pa bacite pogled i počastite se novim znanjem i dobrim provodom:

Sunday, November 27, 2011

Decoupage family workshop (Friday)

Last weekend for me was one hectically creative one. It all started with a small family decoupage workshop with my sister and my aunt on Friday evening.
Decoupage guru in our family is definitely my aunt Marina. Her specialty is napkin decoupage on anything form cardboard boxes to glass vases and textile kitchen cloths. I've mentioned her and Mashtarija in some of my previous posts.
Prošli vikend je za mene bio ludo kreativan, a sve je počelo u petak malom porodičnom dekupaž radionicom sa mojom sestrom i tetkom.
Dobro je poznato da je moja tekta Marina dekupaž guru u našoj porodici. Njena specijalnost je salveta tehnika na svemu i svačemu - od kartonskih kutija do staklenih vazni i kuhinjskih krpa. Nju i njemu kreativnu radionicu Maštarija sam već više puta spominjala u svojim postovima. 
***
We had several concepts of what to do on this occasion including decoupage on wooden beads, but we ended up doing napkin decoupage with seasonal motifs on boxes. We used standard things like acrylic paints, napkins, lacquer, but also lots of glitter, crackling, some patina effect paste etc. For my sister, this was the first time she tried napkin decoupage. Fore me, this was the chance to learn how to do shabby chic.
But the highlight of the evening was trying out something none of us has done before - transfer of printed images on polymer clay. That was something Marina was very eager to try and nailed it in the second try.
Imali smo različite ideje šta bismo sve mogle da radimo na radionici, kao recimo dekupaž na drvenim perlama, ali smo na kraju radile dekupaž salveta tehnikom sa sezonskim motivima na kutijicama. Koristile smo standardni materijal kao što su akrilne boje, salvete, lak, ali takođe i puno glitera tj. šljokica, raspucavanje, pastu za patiniranje itd. Mojoj sestri je ovo bio prvi put da radi dekupaž, a ja sam po prvi put imala priliku da uživo vidim kako se radi shabby chic.
Ali glavna atrakcija večeri je bilo nešto što ni jedna od nas nije pokušala do tada - transfer štampane slike na polimersku glinu. Marina je jako želela da to isproba i uspela je savršeno već iz drugog pokušaja.
The results of our work were great and they made me think how differences in personalities are mirrored in the way they perceive certain things, express their creativity and ultimately in the products of their creative work. Another thing I was very conscious during our work is how the starting idea changes and evolves in the process of creating something, and how, until the very finish, you can't really tell what the final outcome will look like.
My sister's box is in the first picture, followed by Marina's (I think that's obvious) and mine.
Rezultati rada su bili odlični i dali su mi priliku da porazmislim o tome kako se razlike u ličnostima ogledaju u načinu kako posmatramo stvari, kako izražavamo svoju kreativnost i, na kraju krajeva, u krajnjem rezultatu našeg kreativnog rada. Još jedna stvar koje sam bila veoma svesna jeste kako se početne ideje menjaju i evoluiraju u toku rada, i kako do samog kraja nije moguće zapravo znati kako će ono štonapravimo izgledati.
Na prvoj slici je kutijica koju je napravila Ivana, zatim Marina (mislim da je to očigledno), i na kraju moja.
All in all, that was one fantastic creative evening for all of us, which we've ended determined to make it a more regular occasion.
Sve u svemu, veče nam je bilo fenomenalno, tako da smo odlučile da moramo češće da organizujemo ovakva druženja.
PS. Did I say we ha LOTS of FUN???
PS. Ne znam da li sam rekla da je bilo SUPER ZABAVNO???